At Velo Hunt we love adventures, especially bike packing. In the last few years there has been a big increase in riders making adventures out of their cycling, whether it's just for a long day or over multiple days. If you are wanting to take your cycling further, then good planning is a vital skill you need to learn. There are lots of software and devices to help you navigate roads, but if you don't utilise them you'll just be that rider with all the gear and no idea.
I have completed a lot of successful adventures, including coast to coasts and off road rides across the tough Welsh terrain. For all of these I have been the group member planning the routes and of course been the person everyone blames when we got lost. After a lot of years and experience, I now feel I have a solid process for creating the best possible route to maximise the ride enjoyment. I also plan routes that have redundancy in them by ways of additional rest and food stops. An adventure isn't memorable if it all goes to plan, but it doesn’t hurt to have a few alternative plans to fall back on.
This guide doesn't focus on any specific software for generating route plans. It is a guide for the process of putting a trusted plan together. There is a lot of options to choose from with regards to planning software, I'd usually recommend the software you are the most familiar with or one that is created by the device you are using to read it from. The only real application I would highly suggest you use as a companion to your planning software, is Google Maps. It really has no equal when it comes to researching locations, roads and businesses for your adventure.
I hope you find this guide useful in helping you to have many great adventures.


Decide on a Destination and Check the Weather
In most cases this might already be set, if you don’t have a destination in mind then I would start with the weather maps. I would check for locations you could cycle to that have the best weather for when you are riding. I would also check the wind direction too. If you are planning a looped ride (where you finish where you started) I would try starting the ride with a headwind. There is nothing worse than finishing a ride with tired legs and battling a evil headwind. If you are planning a point to point ride, then I would definitely follow the direction of the wind and enjoy the sweet benefits of a tailwind. Sure it might be cheating to some, but it's definitely enjoyable for all.
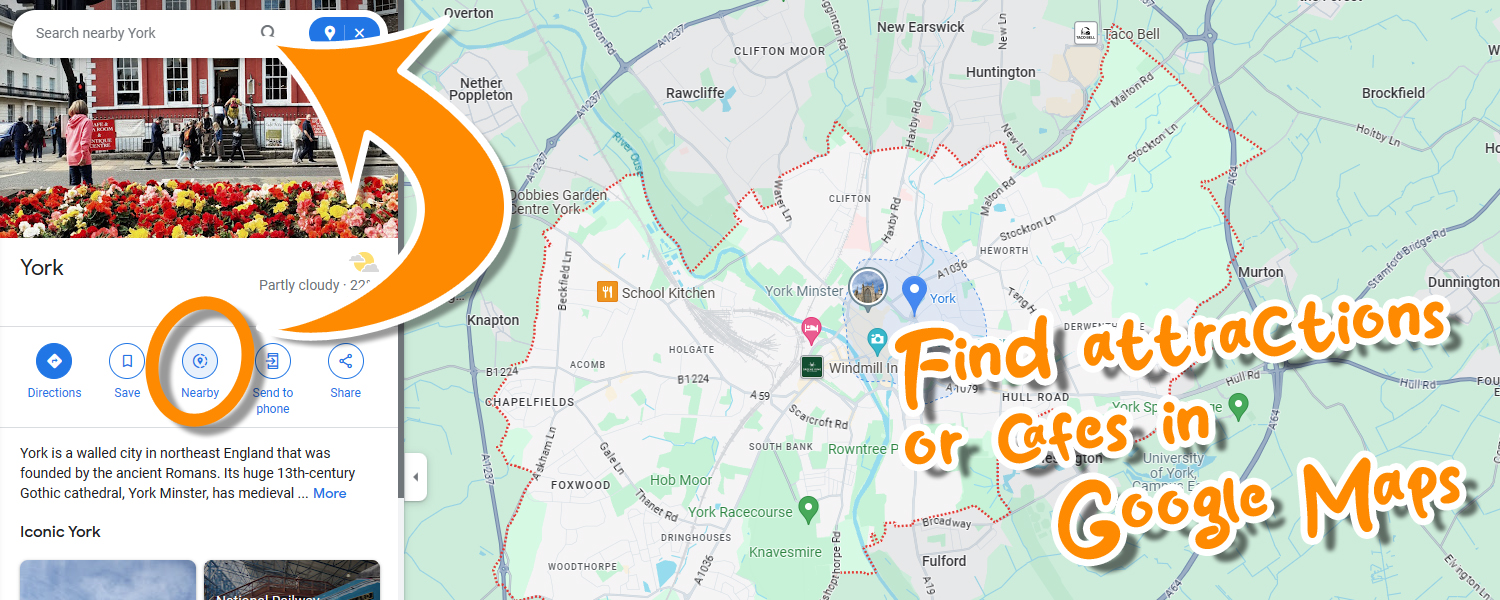
If you are looking for inspiration with a destination, then I always turn to google maps. With an area in mind based on the weather, I would then use the "Search nearby" option to look for local attractions if I wanted something interesting to find. Or my common favourite is to check for a "cycling café", which are always a welcome destination for stops.

Use a Cycling Route Planning Software to Draft up a Route for Checking Distance and Elevation
Before I start planning the route in detail, I check that the destination is within my cycling ability. I do this by using my preferred route planning software, I mark the start and finish points then let the software plan the route using it's stored knowledge. You can also use Google Maps for this by planning a destination and then changing the travel method to bicycle. There are three main factors to work out from this draft route; distance, elevation and time.
Work Out a Realistic Distance for Your Route
Hopefully you will have a distance that you know you are very comfortable at completing. I would use this as a base and plan your adventures distance from there. Be realistic, if you have never completed a 100KM ride before, then there is no point attempting a 200KM adventure. Use your regular rides as a base, if you generally do a 30KM ride a few times a week then you know this will be very enjoyable on your adventure. If you do it regular then doubling that distance should probably be a good challenge. A safe extension of your base ride would be in between that, so maybe 45KM.
Review the Route Elevation and How it Will Impact the Ride
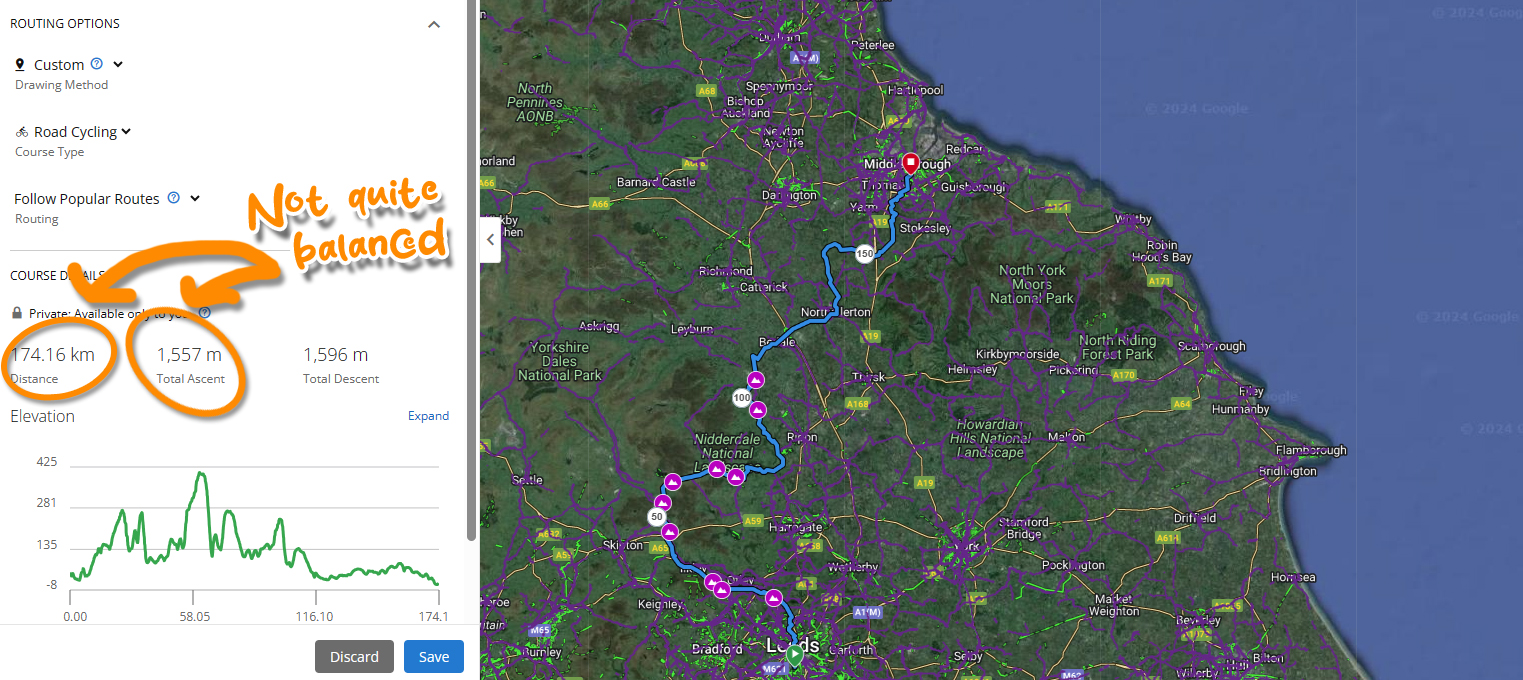
I live in the UK where we use imperial measurement for road distances. For cycling I use metric measurements as I find them easier to use when working out how tough the elevation is going to be. When the distance is 10 times bigger than the elevation, I class this as "Balanced". I personally consider these types of rides to have a balanced amount of climbing to its distance. I understand there could be one big climb and the rest of the route flat, but from my experience, this method is a good indicator of how tough a ride is likely to be. If the elevation is less than a 10th of the distance then I know I will find the ride easier and potentially go faster.
For example; I would class 300m of elevation over 30KM as a balanced ride.
With this scale in mind, I would review rides you know well and see if it matches up to how you feel on them. You may find a "balanced" ride would be easy for you, the key is understanding what your ability scale is so you can compare it with potential routes.
Roughly Calculate How Long the Route Will Take Using Average Speed
This is something that is very easy to get wrong because you have to balance in factors like time lost with climbs and rest stops, etc. With the scale mentioned for elevation, I would use this as a big part in calculating how long you think it will take to complete the ride. I would once again go back to recent rides and try to work out which were "balanced" and what your average speed was. When you have this in mind you can adjust the speed depending on the different variables;
| Routes with less elevation | Increase this average speed slightly as you should be faster with less hills to climb |
| Routes with more elevation | Decrease this average speed slightly as you may be slower climbing up more hills |
| Routes with more headwind | Decrease this average speed slightly as you are likely to be slower battling a headwind |
| Routes with more tailwind | Increase this average speed slightly as you should be faster being pushed along by a tailwind |
| Longer than usual routes | Decrease the average speed as you are likely to be slightly slower with more fatigue from the longer effort |
Once you have a rough idea what your average speed will be, you can divide your distance by it to find out how many hours it will take:
Example: 30KM ride / 17KM/H Average Speed ==> 1.76Hrs (1Hr 46min)
Remember, this is the time it would take you to complete the ride without any rest or food stops. I would generally add 30mins onto that time regardless of other plans. Then add time for scheduled stops you plan to make on the journey.

How to use Google Maps to Check for Cycle Friendly Roads
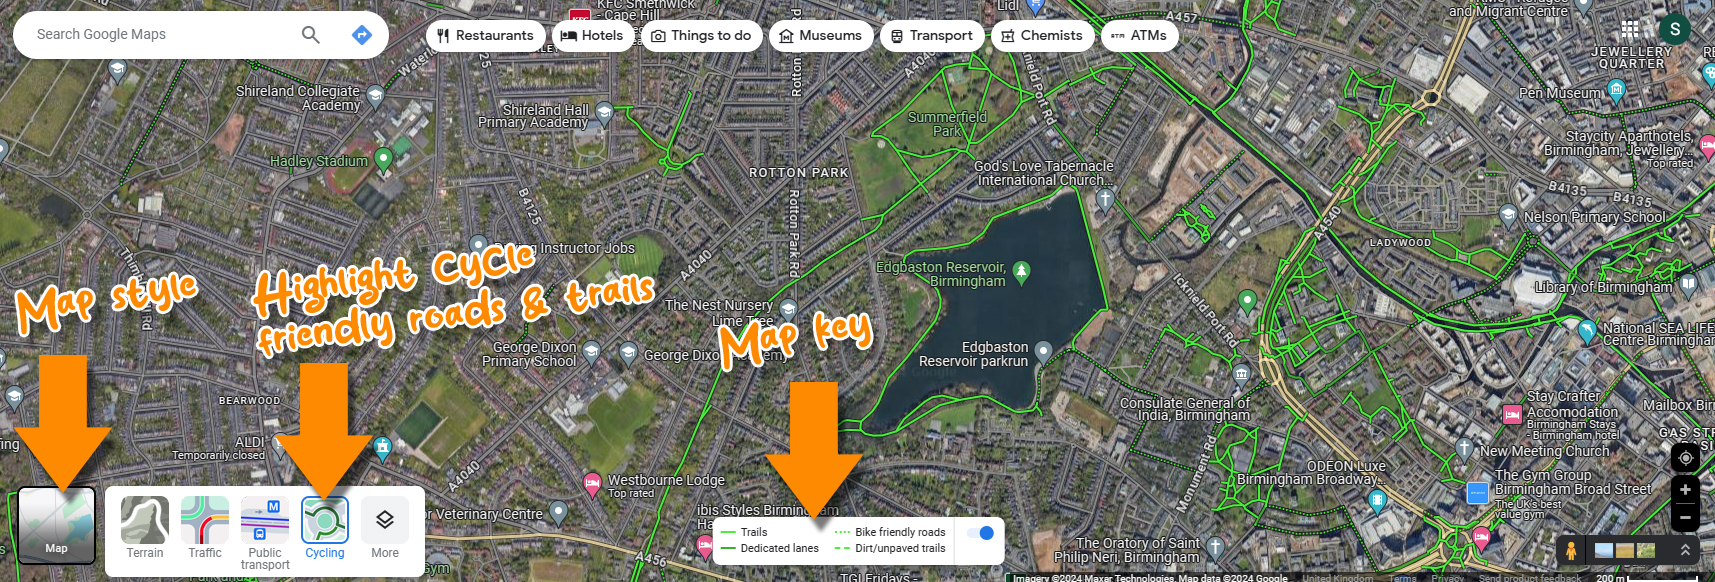
For the next stage, I use google maps to highlight all the cycle friendly roads in the general area I'm planning to ride. This is to give me an idea on how I want the route to snake around on its way to the destination. I find Google maps is usually better at this than specific bike route planners because the roads highlighted on Google mainly come from the highways agencies. Suggested roads on cycle route planners like Strava and Komoot are usually based on rider heatmaps. This is the popularity of the road and not necessarily how friendly it is. An example of this would be, a busy road that gets used a lot by people commuting as a necessity to get to work. The planner sees it as popular, but it's not cycle friendly.
To view cycle friendly roads on Google, you just apply the cycling overlay. Cycle friendly roads and cycle paths will appear in green. This is a great feature to use if you're ever cycling somewhere new like on a holiday. When you have a general idea of the route you want to take, its time to head back to your cycle routing software to plot it out in detail.
Top Tip: I always prefer to use the satellite view in Google Maps. I find it helps me match up areas better when I move back to my route planning software. I also visually see locations that I will end up finding on the ride.

Rebuild Your Route Using Your Favourite Planning Software and Google Maps
There are a few great options for this. The main favourites are Strava and Komoot, although Strava now requires you to have a paid membership. If you have a Garmin or Wahoo cycle computer, then these have great planning software to use. I have Garmin devices, so I always build my routes in their planner.
From experience I have found that it is better to rebuild a route than to download one. When I did a ride across Wales, I used a gpx file someone else had provided. As soon as I started the ride I realised that the route wasn't aligned with the roads on my display. I spend the whole weekend riding alongside the route, which made it harder to navigate.
When planning routes I always have the satellite view on to help me match locations to google maps. I also turn on the heat maps for road bikes so I can see popular roads. This is used as a backup, in case there are no google friendly cycle roads available, which there always will be.
Top Tip: Some route planners allow you to add key markers to your route. This is so you can highlight locations for distance markers, climbs and of course food stops. These become very handy during long rides, especially for any back up plans.

Review the Route with Google Street View
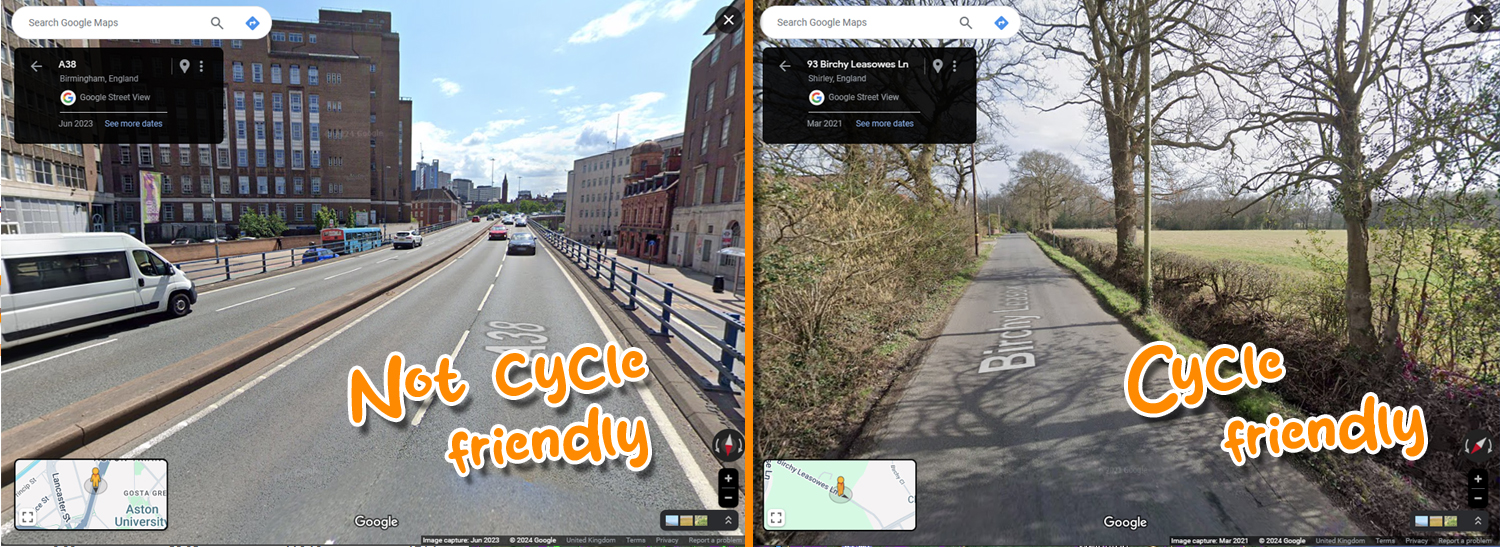
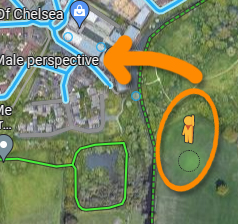 We are now getting onto the final stages of the planning. When I feel the route is almost complete, I carefully go over it again from start to finish. On this run I will use Google street view to sample some of the roads to make sure they look cycle friendly. A good sign is if you can't see any traffic around while the Google van was collecting it's images. I also like to do this so that when I'm riding the route, I get some reassurance when I recognise streets to know I'm not lost yet.
The other thing I do while I'm reviewing the route, is pick out possible places to stop for rest or food. It is great to plan for scheduled food stops on a ride, but sometimes it's the unscheduled ones that end up making a difference. If the weather changes, then you might find you need to have a break a lot earlier than planned. With this in mind, I will mark out possible stops on my planner that are more regular and could be used in an emergency. From experience, I have definitely ended up using some of these in the past, mainly when I'm riding with others and the abilities vary.
A final area I would review, is the climbs I will encounter on the route and their gradients . I would use my planner to double check how severe they are and whether it is worth trying to plot a detour round them. This once again depends on who you are riding with or if you are riding over a longer distance with extra weight.
Enjoy the Adventure
Hopefully, when all that is complete you should be all planned and ready to ride. Remember, adventures rarely stick with the plan completely. The additional challenges you have to face all add to the fun of it. But a good planned route should limit those challenges and some of the worries. No one is perfect and neither is an adventure.
If you have any questions about our guide or want to share your experiences, please contact us via the usual channels.
|

 VeloHunt Steve